Ultra-Trace Elemental Control in Custom Parts with GDMS Analysis
Introduction
Achieving ultra-trace elemental control is critical in modern custom parts manufacturing, particularly for industries where material purity directly impacts product performance and regulatory compliance. In aerospace, medical, and semiconductor components, the presence of trace elements at parts-per-billion (ppb) levels can influence fatigue resistance, corrosion behavior, and long-term structural integrity.
Glow Discharge Mass Spectrometry (GDMS) provides unmatched sensitivity and comprehensive multi-element detection, making it a key tool for ultra-trace elemental verification. Compared to conventional spectroscopic methods, GDMS achieves lower detection limits across a broader range of materials, including refractory metals and specialty alloys.
This article explores practical applications of GDMS analysis in precision manufacturing workflows. It highlights how integrating GDMS into quality assurance processes enables manufacturers to meet stringent industry standards, optimize material performance, and enhance component reliability in critical applications.
 What is GDMS Analysis?
Principles of GDMS Technology
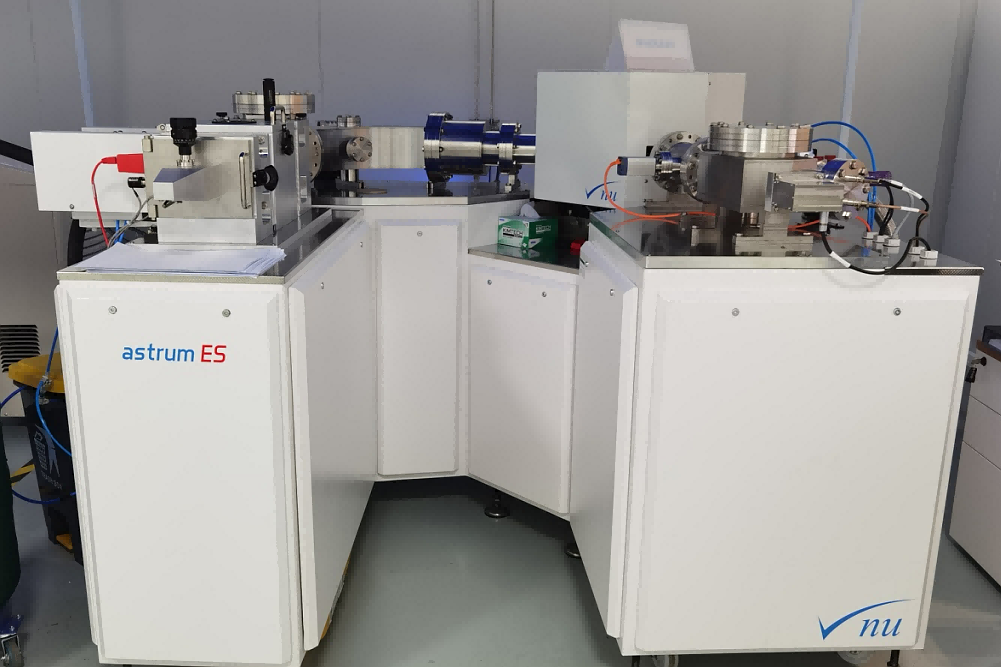
Glow Discharge Mass Spectrometry (GDMS) is an advanced analytical technique designed for ultra-trace elemental analysis of solid materials. The method operates by generating a low-pressure glow discharge in an inert gas, typically argon, which sputters atoms from the sample’s surface. These atoms are then ionized and analyzed in a high-resolution mass spectrometer.
GDMS provides two key advantages:
Detection limits reaching parts-per-billion (ppb) and parts-per-trillion (ppt) levels.
The ability to quantify almost all elements in the periodic table, including gases such as oxygen and nitrogen, within a single analysis cycle.
This capability is essential in precision manufacturing, where even trace impurities can lead to significant performance degradation. For example, hydrogen contamination in titanium alloys may cause embrittlement, while sulfur in stainless steels can impair corrosion resistance. GDMS offers a powerful solution to detect and control such impurities at ultra-low levels.
Comparison with Other Spectroscopy Techniques
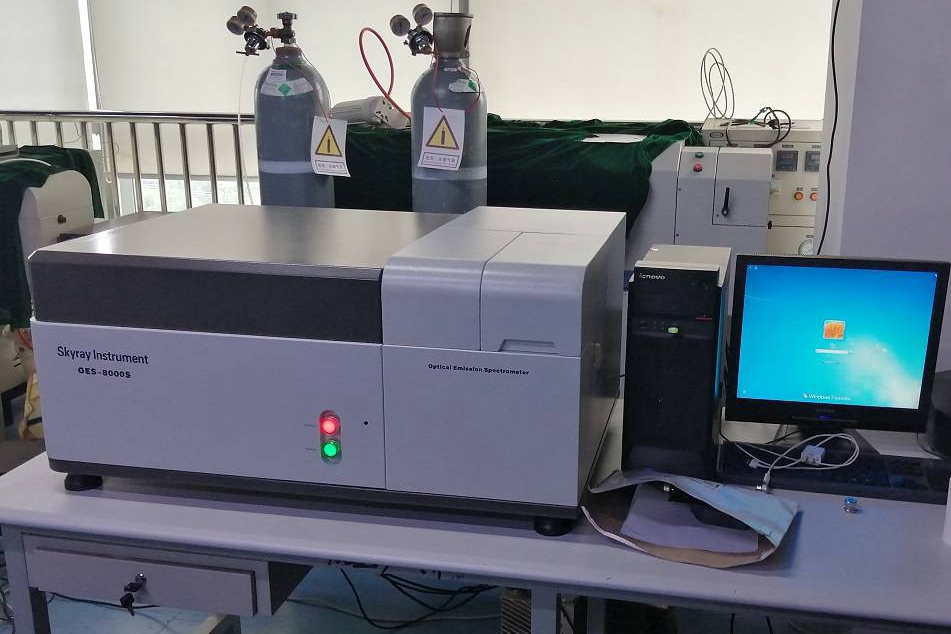
Compared to common elemental analysis tools, GDMS delivers superior performance in ultra-trace applications. Conventional direct reading spectrometers, such as Optical Emission Spectroscopy (OES), are ideal for bulk composition analysis but are limited to detection levels in the parts-per-million (ppm) range. Similarly, X-ray fluorescence (XRF) provides non-destructive testing but lacks the sensitivity required for ppb-level control.
In contrast, GDMS excels at detecting trace contaminants that affect critical part performance, making it highly complementary to dimensional and mechanical verification techniques. For example, pairing GDMS with CMM-based dimensional inspection ensures both chemical purity and geometric accuracy in mission-critical parts. This holistic approach enables manufacturers to meet the rigorous demands of aerospace, medical, and advanced electronics sectors.
Why Ultra-Trace Elemental Control Matters in Custom Parts
Impact on Material Properties
Ultra-trace elemental control directly affects the mechanical, chemical, and thermal performance of custom components. Even minute quantities of residual elements—measured at parts-per-billion (ppb) or parts-per-trillion (ppt)—can alter critical material properties. For example:
In nickel-based superalloys, sulfur and phosphorus contamination at ppb levels can cause grain boundary embrittlement, reducing fatigue life.
In titanium alloys, excess interstitial oxygen or nitrogen can increase strength but drastically lower ductility, compromising component reliability.
In copper alloys, trace lead may impair electrical conductivity, limiting their suitability for high-performance electronic applications.
By enabling precise control over these elements, GDMS analysis allows manufacturers to fine-tune materials for optimal performance and durability.
Industry Requirements
High-tech industries impose stringent elemental purity standards to ensure product safety and reliability.
In the aerospace sector, components such as turbine blades, airframe structures, and fasteners must comply with strict standards (e.g., AMS 2304, GE-S400) for ultra-trace cleanliness to prevent in-service failure under cyclic loading and extreme temperatures.
For medical device applications, biocompatibility standards (ISO 10993, ASTM F138) demand precise control of trace impurities in implantable alloys to prevent adverse biological reactions.
In automotive manufacturing, next-generation EV components—such as battery contacts, high-performance drivetrain parts, and lightweight structural components—require traceability and elemental purity to ensure long-term corrosion resistance and mechanical integrity.
Case Examples of Elemental Control Benefits
Manufacturers using GDMS-based control have demonstrated measurable improvements in product performance:
Aerospace turbine discs produced with ultra-trace controlled titanium alloys showed a 25% increase in high-cycle fatigue life.
Medical implants manufactured with ultra-clean CoCr alloys exhibited superior corrosion resistance, extending in vivo longevity.
Automotive high-strength steels with ultra-low residual elements achieved enhanced weldability and fatigue performance in lightweight chassis systems.
These results underscore the importance of ultra-trace elemental control in delivering superior part quality and competitive differentiation in advanced manufacturing.
How GDMS is Applied in Custom Parts Manufacturing
Process Integration
Integrating GDMS into modern custom parts manufacturing requires a systematic approach, starting at material selection and continuing through final inspection. In advanced precision casting, for example, GDMS is used to verify alloy purity before mold filling to prevent contamination-induced defects such as inclusions or hot tearing.
Similarly, in sheet metal fabrication, ultra-clean sheet materials are validated by GDMS to ensure consistent weldability and corrosion resistance in aerospace or medical enclosures. This reduces the risk of defects during downstream joining or surface treatment operations.
For prototype and low-volume production, CNC machining prototyping often employs specialty alloys or advanced composite materials where elemental purity is critical to achieving desired mechanical performance. GDMS ensures that incoming raw materials meet stringent compositional specifications prior to machining, reducing scrap rates and optimizing process yield.
GDMS Testing Workflow
A typical GDMS testing workflow in custom manufacturing involves multiple control points:
Incoming material inspection — verifying supplier certificates and performing GDMS spot checks to validate raw material purity.
In-process validation — performing intermediate sampling on partially processed parts or cast billets to detect contamination introduced during handling or thermal cycles.
Final component release — using GDMS to certify that finished parts meet customer-specific elemental specifications, particularly for aerospace and medical contracts requiring full traceability.
This staged approach ensures that elemental quality is maintained throughout the production lifecycle, from raw material intake to finished part delivery.
Quality Assurance Loop
GDMS also plays a key role in the continuous improvement of manufacturing processes. By integrating GDMS data into the PDCA control system, manufacturers can systematically reduce process variability and improve material consistency.
For example, if GDMS reveals trace contamination trends linked to a particular heat-treatment batch or supplier lot, corrective actions can be implemented during the Act phase of PDCA. Over time, this data-driven feedback loop enhances the robustness of custom part production, leading to higher quality yields and improved customer satisfaction.
Case Study: GDMS Control in High-Precision Aerospace Parts
Project Background
A global aerospace OEM commissioned Neway to manufacture a series of thin-wall, high-stress structural components for a new generation of aircraft. The parts were designed for use in fuselage subassemblies and demanded compliance with industry standards such as AMS 2759 and GE-S400 for fatigue resistance and traceability. Target tolerances were ±0.01 mm, and material requirements specified ultra-low impurity levels—particularly for oxygen, sulfur, and phosphorus—below 10 ppb.
Given these stringent demands, GDMS analysis was integrated as a core element of the project’s quality assurance plan.
Implementation of GDMS Control
In collaboration with the client, Neway implemented a multi-stage GDMS control strategy:
Material qualification — All incoming titanium and aluminum alloys underwent GDMS testing to validate conformance to the client’s proprietary purity specifications.
In-process verification — Following precision aerospace sheet metal fabrication, intermediate GDMS sampling ensured no contamination was introduced during hot forming and heat treatment.
Final release — Prior to shipment, fully machined parts were subjected to batch-level GDMS certification, verifying that ultra-trace elemental profiles remained within specification post-high-precision CNC machining.
By embedding GDMS checkpoints at key process stages, the project team ensured complete material traceability and purity control across the entire production workflow.
Results and Lessons Learned
The GDMS-integrated quality assurance strategy delivered significant performance improvements:
Fatigue life testing showed a 22% increase in high-cycle endurance versus baseline components without ultra-trace control.
Post-machining yield improved by 18%, thanks to the early detection of off-spec material before final processing.
Customer audits praised the traceability and consistency achieved through the GDMS program, leading to expanded contract awards for future aerospace programs.
This case study demonstrates that GDMS is not merely a laboratory tool but a vital enabler of competitive advantage in high-end aerospace manufacturing.
Advantages of GDMS Analysis for Custom Parts Manufacturers
Comprehensive Element Detection
GDMS offers an unparalleled ability to detect nearly all elements across the periodic table, including light elements such as hydrogen, carbon, nitrogen, and oxygen, which are difficult to analyze with conventional spectroscopic techniques. This breadth of capability enables manufacturers to perform a full elemental audit on raw materials, in-process components, and final parts with a single analytical method.
Such comprehensive detection is particularly valuable in industries where regulatory standards demand proof of ultra-low impurity levels. Manufacturers can verify not only that key alloying elements are within tolerance, but also that detrimental trace elements—often overlooked by traditional bulk analysis—are effectively controlled.
Quantitative Ultra-Trace Sensitivity
One of the defining strengths of GDMS is its extraordinary sensitivity. Detection limits routinely reach the ppb or even ppt range for most metallic and non-metallic elements. For comparison:
Optical Emission Spectroscopy (OES) typically achieves limits of detection (LOD) in the 1–10 ppm range.
Inductively Coupled Plasma Mass Spectrometry (ICP-MS), while capable of ppb detection, often requires complex sample preparation not suitable for solid metals.
In contrast, GDMS directly analyzes solid samples, preserving the material’s integrity and providing a true representation of elemental distribution. This capability is critical for controlling impurities that affect grain boundary behavior, mechanical fatigue, and corrosion performance.
Support for Industry Certifications
By integrating GDMS into production workflows, manufacturers can streamline compliance with industry-specific quality standards. For instance, in quality assurance in CNC machining, GDMS data supports material certifications for aerospace (AMS 2304), medical devices (ASTM F138), and automotive (IATF 16949) applications.
GDMS results can also be archived as part of product documentation packages, enhancing customer confidence and simplifying third-party audits. In competitive markets where material traceability is a key differentiator, the ability to demonstrate ultra-trace elemental control provides a compelling value proposition.
Conclusion
As advanced manufacturing continues to evolve, ultra-trace elemental control has become an essential component of quality assurance in custom parts production. GDMS analysis offers a unique combination of comprehensive element coverage, ultra-low detection limits, and direct solid-sample testing, making it the method of choice for ensuring material purity in high-performance applications.
By integrating GDMS into their custom parts manufacturing service, industry leaders like Neway can consistently deliver components that meet or exceed the most demanding specifications for aerospace, medical, and automotive markets. Beyond compliance, GDMS enables manufacturers to drive process improvements, reduce variability, and enhance product reliability.
For organizations seeking to optimize their quality systems and unlock new opportunities in precision manufacturing, ultra-trace elemental control in custom parts with GDMS analysis provides a powerful toolset. As customer expectations and regulatory requirements continue to rise, GDMS will play an increasingly vital role in maintaining competitive advantage in global manufacturing.
