What Are the Defects and Solutions of 3D Printing Services
3D printing defects are manufacturing risks that come from the printing process, material behavior, part geometry, build orientation, machine settings, and post-processing route. The practical RFQ problem is deciding which defects could affect the prototype part's fit, strength, surface finish, inspection result, or end-use function and which controls should be included before quotation.
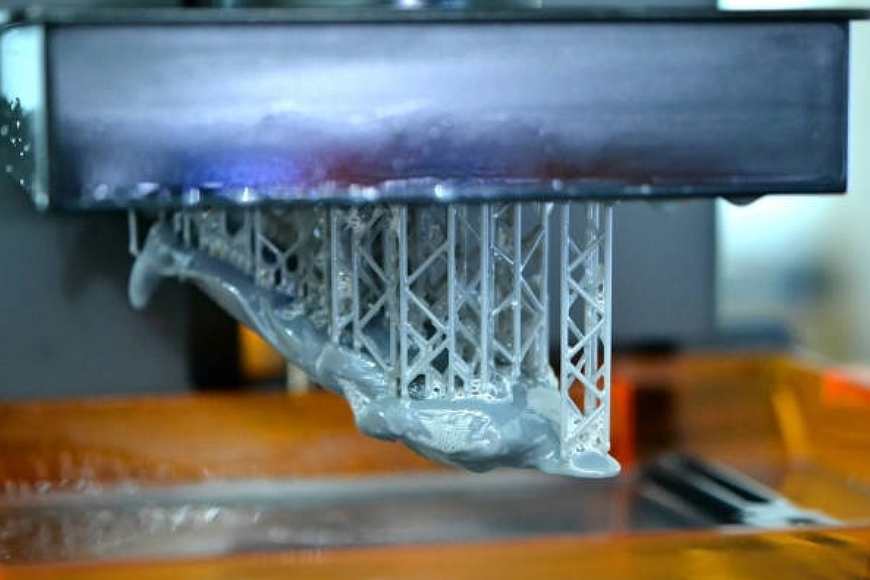
What are the most common 3D printing defects buyers should check?
The most common 3D printing defects include poor layer adhesion, warping, dimensional variation, stringing, sagging overhangs, delamination, surface roughness, clogged extrusion paths, incomplete curing, porosity, support scars, and trapped powder or resin. The exact risk depends on the process, material, part size, wall thickness, and build orientation.
Buyers should identify which defects matter for the prototype. A cosmetic surface defect may be acceptable on a hidden fixture, but the same surface defect may be unacceptable on a customer-facing housing. A small dimensional deviation may be acceptable on a display model, but not on a sealing face, bearing seat, snap feature, or threaded assembly point.
3D printing defect | Likely manufacturing cause | Practical solution or control | RFQ implication |
|---|---|---|---|
Layer adhesion weakness | Material, temperature, build orientation, or curing problem | Select suitable material, adjust process settings, and orient load paths carefully | State load direction and functional surfaces |
Warping or curling | Thermal shrinkage, residual stress, large flat areas, or poor bed adhesion | Review geometry, build orientation, support strategy, and material choice | Mark flatness and assembly requirements |
Dimensional inaccuracy | Shrinkage, calibration, support removal, or process variation | Use process compensation, inspection, and post-machining where needed | Separate critical dimensions from noncritical features |
Stringing or excess material | Extrusion, temperature, retraction, or travel path issues | Tune print parameters and plan cleanup or finishing | Define cosmetic and clearance requirements |
Overhang sagging | Unsupported geometry or insufficient support design | Add supports, change orientation, or redesign overhang features | Confirm support access and visible surfaces |
Delamination | Weak bonding between printed layers or thermal stress | Control material condition, process temperature, and build orientation | Review mechanical test requirements |
Z-banding or layer lines | Machine motion, vibration, layer height, or process setting variation | Adjust machine condition, layer planning, and finishing method | Define appearance and surface finish expectations |
Nozzle or feed clogging | Material contamination, moisture, filler content, or feed instability | Dry material, filter feedstock, and maintain extrusion hardware | Confirm material handling requirements |
Porosity or voids | Powder fusion, binder, sintering, or extrusion inconsistency | Review density, process route, heat treatment, or impregnation needs | State pressure, sealing, or strength requirements |
Support scars | Support contact, removal damage, or inaccessible support areas | Plan support placement, finishing, and critical surface orientation | Identify visible and functional surfaces |
Incomplete curing | Resin exposure, post-cure condition, or material thickness issue | Control curing route and verify material performance | Share functional use and exposure environment |
Trapped powder or resin | Closed channels, small drain holes, or inaccessible internal geometry | Add drain paths, inspection access, or geometry changes | Highlight internal passages and cleanliness needs |
How can layer adhesion and delamination defects be reduced?
Layer adhesion and delamination can be reduced by matching material, process settings, build orientation, and loading direction. These defects are important because 3D printed parts can be direction-sensitive, especially when the part carries load across layer boundaries.
The supplier should understand how the prototype will be used. A bracket under bending load, a snap-fit feature, a flexible cover, and a fixture under repeated clamping all create different layer stress. The RFQ should state load direction, service temperature, repeated assembly needs, and whether the part will be used only for fit checking or for functional testing.
Design changes may also help. Larger fillets, smoother transitions, thicker load paths, adjusted hole placement, and revised orientation can reduce stress concentration. If the defect risk remains high, CNC machining, injection molding, or another manufacturing route may be more suitable for the final validation part.
How can warping, dimensional inaccuracy, and flatness problems be controlled?
Warping and dimensional inaccuracy are often linked to thermal behavior, shrinkage, material selection, part size, wall thickness, and support strategy. Large flat parts, thin walls, uneven sections, and long unsupported spans can be more sensitive to distortion.
Controls may include changing build orientation, adding supports, adjusting wall thickness, splitting the part, selecting a more stable material, using process compensation, or machining critical interfaces after printing. The buyer should not apply strict dimensional requirements to every feature without identifying which features are truly functional.
Inspection planning matters. Critical dimensions, datums, holes, sealing faces, and assembly interfaces should be shown on the drawing. Noncritical cosmetic features can often accept broader variation if the prototype is being used for concept review rather than final functional validation.
How should buyers handle surface defects, support marks, and post-processing?
Surface defects should be handled according to the surface's function. Layer lines, support scars, stringing, powder texture, resin marks, or sanding marks may be acceptable on noncontact surfaces but may be unacceptable on sealing surfaces, sliding surfaces, bonding surfaces, or customer-facing cosmetic faces.
Post-processing can include support removal, sanding, bead blasting, polishing, painting, coating, sealing, heat treatment, curing, tapping, insert installation, or CNC machining. Buyers should specify which surfaces are cosmetic, which surfaces are functional, and which surfaces may remain as-printed.
Support planning should happen before printing. If support marks appear on a visible face, sealing face, or precise assembly surface, finishing may add cost or may still not meet the requirement. The RFQ should call out protected surfaces so the build orientation and support strategy can be planned around them.
How do material handling and process control affect 3D printing defects?
Material handling affects many 3D printing defects. Moisture, contamination, powder condition, resin age, filler content, and storage conditions can influence extrusion stability, layer bonding, curing behavior, surface quality, and final strength.
Process control also matters. Machine calibration, nozzle condition, energy input, layer height, scan strategy, bed temperature, chamber temperature, support structure, curing time, and post-processing route all affect defect risk. A buyer does not need to specify every machine setting, but the buyer should specify the part function and acceptance criteria.
For functional or end-use printed parts, the RFQ may need inspection reports, material information, sample testing, or agreed acceptance criteria. The required evidence should match the risk of the part's use.
What should buyers include in a 3D printing RFQ to prevent defects?
A defect-aware 3D printing RFQ should include the 3D CAD model, 2D drawing, material requirement, prototype purpose, quantity, critical dimensions, load direction, thermal or chemical exposure, cosmetic surfaces, assembly requirements, surface finish needs, post-processing requirements, and inspection method.
Buyers should also explain the acceptance standard for defects. For example, a part used only for packaging review may accept visible layer lines, while a functional fluid part may need leak testing, surface sealing, clean internal channels, and inspection of critical interfaces.
The practical solution is not to claim that defects never occur. The practical solution is to connect each defect risk to a process control, design adjustment, material decision, finishing step, or inspection requirement before the printed part is quoted and manufactured.
Related FAQs